Every One Can Create Music
Recording audio has incredible power to enable pupil voice and individual expression.
We no doubt all have some experience of how music, a simple melody, can evoke memories and transport us back to a moment in time…. We can be deeply moved by a story told straight from a songwriter’s heart, or lifted by a beat.
Music is a language of hman expression. Every culture has its own form of music, enjoyed by all ages.
This Module will enable you to:
- Record your voice with the Audio Recorder and change your voice using effects
- Preview and select audio loops to enhance the mood of the story.
- Edit audio recordings to create polished interviews and stories.
You will need
- GarageBand available for iPhone & iPad.
You are also advised to have downloaded the following free ibooks available from Apple Book Store:
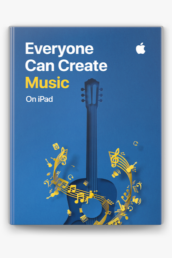
- Everyone Can Create Music on iPad
- Everyone Can Create Teacher Guide
- Everyone Can Create Teacher Guide – Early Years
NB: If you are using a school device managed by an Mobile Device Management (MDM) solution, each book and app will need to be purchased (no charge) and deployed through the MDM service. Your MDM administrator will need to know how many licences are required for each and which devices (or users, if set up as shared devices) you want to give access to.


We’re starting with the basics of voice to gain the confidence and skills you need to tell your own story through a podcast or song as we explore Garage band on the iPad.
Even if you’ve never taken a music lesson, we’ve all played an instrument – our voice.
You can make it go louder, softer or lower… changing the way it sounds.
In garage band, you can record your voice, add sound effects, music and more to create a podcast, build a news report, record an interview for a class project and share your story with a wider audience…
Not only can you explore the options of volumes, pitch and speed when you record your voice, listening back to your voice can help you to
- improve the way you tell a story,
- review how you present information,
- consider how it sounds to others.
Activity 1
Recording a podcast
Chapter 1, Pages 6 – 11
From the Everyone can Create Music on iPad book
Following the instructions from the book:
- Open GarageBand and select + to create a new project
- Navigate to and select the Audio recorder.
- You are advised to select the Fun tab rather than the Studio tab. This allows retrospective changes to to the settings , so just pick one and see how you can still review and adjust your recording afterwards..
- Be aware of where the mic is on the ipad and sure that this is pointing toward the sound you want to record, making sure it isn’t being covered by your fingers or any stand or pop you may be using.
- Turn off the metronome – this will tick to count you in, but it you’ve left it on for your recording, it can’t be removed and you’ll need to re-record.
- Wait for the countdown and then take a short pause – it is often easier to trim away excessive silence than it is to start over.
- Playback your recording to review it. Having selected the Fun tab, you can now select any of the other options to hear how they change your recording. Select the one of your choosing before moving on to activity 2.
Activity 2
Using Loops to enhance your story.
Chapter 1, Pages 12 – 15
From the Everyone can Create Music on iPad book
Loops are pre-recorded audio snippets that you can use to add drumbeats, music or sound effects to a project.
They’re called loops because you can usually make them “loop” to repeat for as long as you want them to in your recording.
You can choose from thousands of Apple Loops in Garage band to build atmosphere, drama and fun into your recorded podcasts, stories and music.
Following the instructions from the book:
- Select the icon that looks like a brick wall (top left of screen). You are now in the Studio view and will see your recording as a track in your project.
- Select the Loop icon (top right of screen)
- Tap in Search Apple Loops or use the Filter by option if you know which loop package to look for. Note the option to look for more Apple Loops – here you can download additional packs from the Sound Library with an option to preview first.
- Select some different loop options and preview them. You can select to play your voice track and preview different loops so you can hear them together.
- You will likely notice how the loop can make it hard to hear your voice recording. Use the volume slider at the bottom of the Loop browser to adjust the audio.
- Select a loop and add it to your project.
- Drag the loop to an empty part of the Tracks view screen. Garageband automatically creates a new track in your project and adds the loop to it.
- Drag the loop to align its left edge with the section of your recording where you want it to start playing – if you want it to start at the very begining, drag it all the way to the left.
- Tap the loop to select it. then tap Loop in the menu and it will automatically loop to repeat for the duration of your project.
- Review your entire project and tap stop when you have finished
- Tap the My Songs icon to exit an save your project.
Through the power of Apple Music, you have unprecedented access and use of professional Loops in GarageBand from popular artists.
Activity 3
Edit an interview
Chapter 1, Pages 16 – 20
From the Everyone can Create Music on iPad book
Interviews are a great way to gather and share information. When you record an interview in GarageBand, the voices of both interviewer and interviewee are recorded onto a single track.
If one is louder than the other, which is often the case, you can split the recording and put each on it’s own track to balance the volume.
In this activity you will learn audio editing techniques for splitting recordings and making adjustments to give your projects a polished and professional sound.
Following the instructions from the book:
- Download and open the project files for this actifvity – these are linked to on page 16 of the book, but you can also access these from the Materials section at the top of this module.
- If you can’t access the files through either route, you can always record two sound tracks of your own to work with for this activity.
- Split the region: Each chunk of recorded audio that you add to a project is shown on the timeline as a coloured rectangle called a region. You can split, move and trim regions to edit recordings.
- Reviwing the recordings, select a section of the region to split the recording, draging the scissors down to separate the region into two separate regions.
- Add a new track: You can now put each voice recording on its own track.
- Tap the microphone on track 1, then tap it again to duplicate.
- Touch and drag the second region on track 1, down on to track 2.
- Trim the silence: Sometimes, interviews include long pauses between questions and answers – this is an advised way of recording them, allowing for easier editing if sections need to be cut out or added in…. but you will need to remove the dead space to make your finished piece easier to listen to. Trim the regions to remove these stretches of silence.
- Adjust the volume of each track: Now that the voices from the interview are on separate tracks, you can adjust the volume of each one separately.
- Drag the handle to the right to show the mixer controls for each track, including th Mute button, a Solo button and a Volumen slider.
- Use the volume sliders to balance the volume of both voices.
- Tap the My Songs icon to save and close your project.
- Export and share your project:
- From the My Songs broswer, touch and hold a project, then tap Share.
- Tap Song.
- Select High Quality, then tap Share.
- Chose the method you want to use for sending your song.
Note that for Copyright reasons, Songs can only be exported if they contain the recording of a Touch Instrument or a Live Loop.
Why does it matter?
As with the activities we completed before with the Camera and Photos App, these might be simple, fun task… but the aim is to allow the time to explore and make mistakes, guiding our children through the tools available, critiquing their choices and giving them the skills to confidently make choices which they can then use in purposeful situations.
Select each of the headings below to read more:
Reflect on your own activities here and think about how you might use this in the classroom. Consider the discussions and statements shared during the Every One Can Create sessions and in particular
- The benefits of Creativity for learners
- What Creativity might look like in the classroom / for your learners
Apple believes that
- Recording vocal tracks creates a risk-free environment for students to practice audience awareness and to communicate ideas better through inflection and tone.
- Adding Live Loops makes it easy for students to create original recordings by arranging clips.
Classroom Task
Plan, record and edit a short podcast.
Use Chapter 1, Page 21
From the Everyone can Create Music on iPad book
The classroom task is for you to complete with your pupils.
Selct each of the options to consider how you might approach this task:
As appropriate for the children you are working with, you may decide to share the ibook with them before embarking on this project, covering the activities you have completed here to prepare them for the this task.
Bear in mind that you will need to have obtained the licences for the Everyone Can Create iBook and deployed them to the pupil iPads first.
- Do you know who manages this in your school?
- It may be some one in school or a third party technical service.
See this Module’s Materials section to access a Design Workbook
Is this an individual or collaborative challenge?
However you challenge your children, don’t miss out on the planning stage, setting key objectives with them to help them map out the needs.
Are they to Interview a teacher, visitor, class mate or family member?
Plan out the questions that are to be asked – pupils could
- share the questions ahead of the “interview” to allow the interviewee to prepare their answers
- record their questions, with pauses in between, before asking the interviewee.
Also consider whether the main objective here is for the children to explore the possibilities, or do you require a specific outcome?
See this Module’s Materials section to access a Design Workbook
Reviewing of our plans, available resources, time and outcomes aswell as acting on feedback from others, are critical skills in life.
In the same way that this course encourages you to reflect on your activities, this activity offers opportunities to encourage your pupils to do the same and to consider
- What went well?
- What might have worked better?
- What changes might they make next time?
Can you make time available for peer to peer review?
Update your journal
This not only gives you a chance to plan, reflect and review, your notes can also be uploaded to build your Apple Teacher Portfolio so that you can gain your Apple Teacher Accreditation.
See the Module Materials section if you haven’t already accessed the Participant Workbook or the Apple Teacher Portfolio Template.
